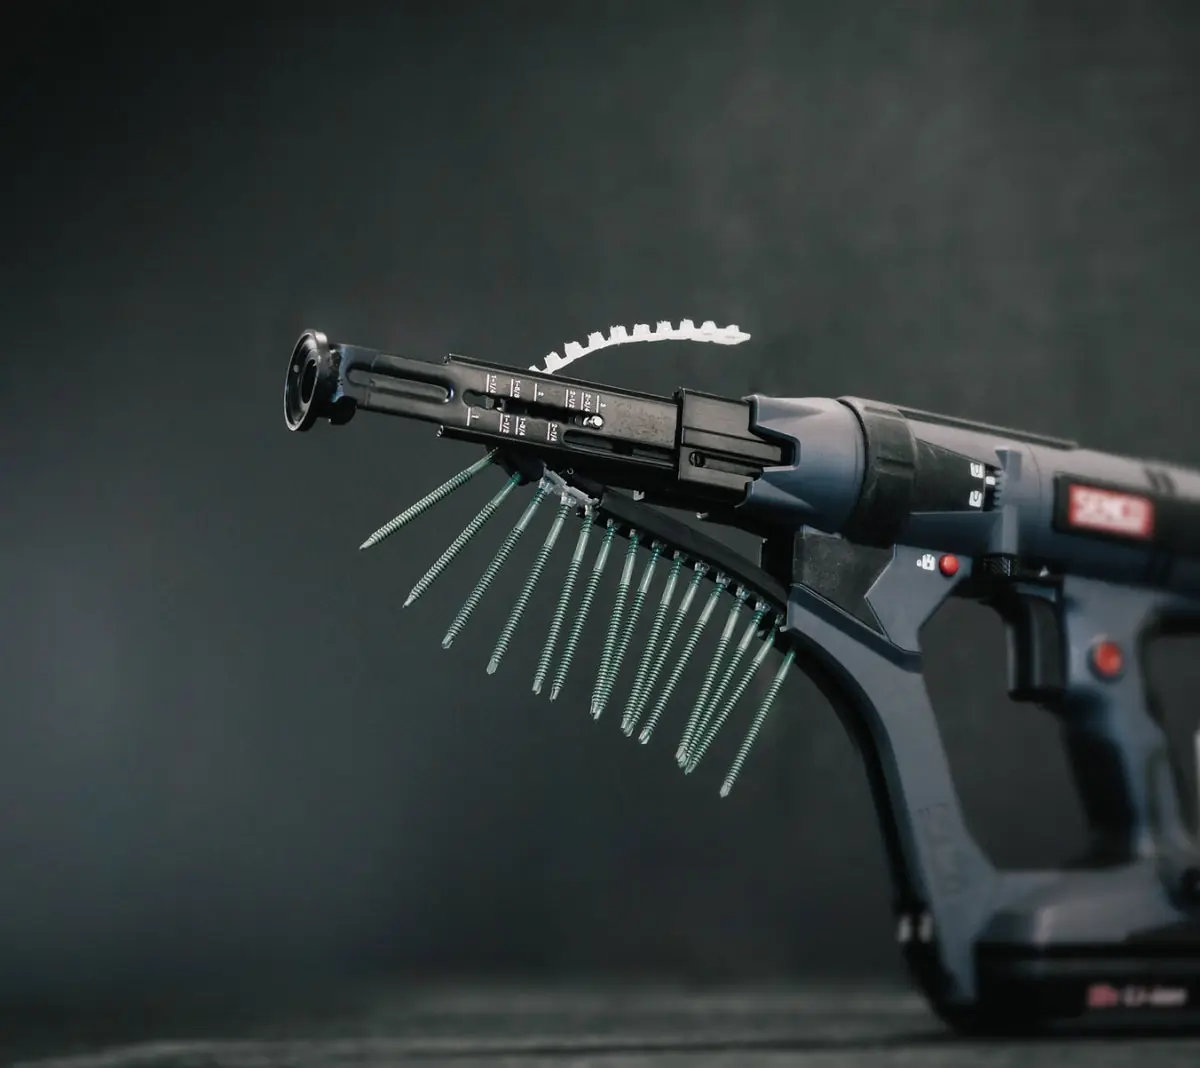
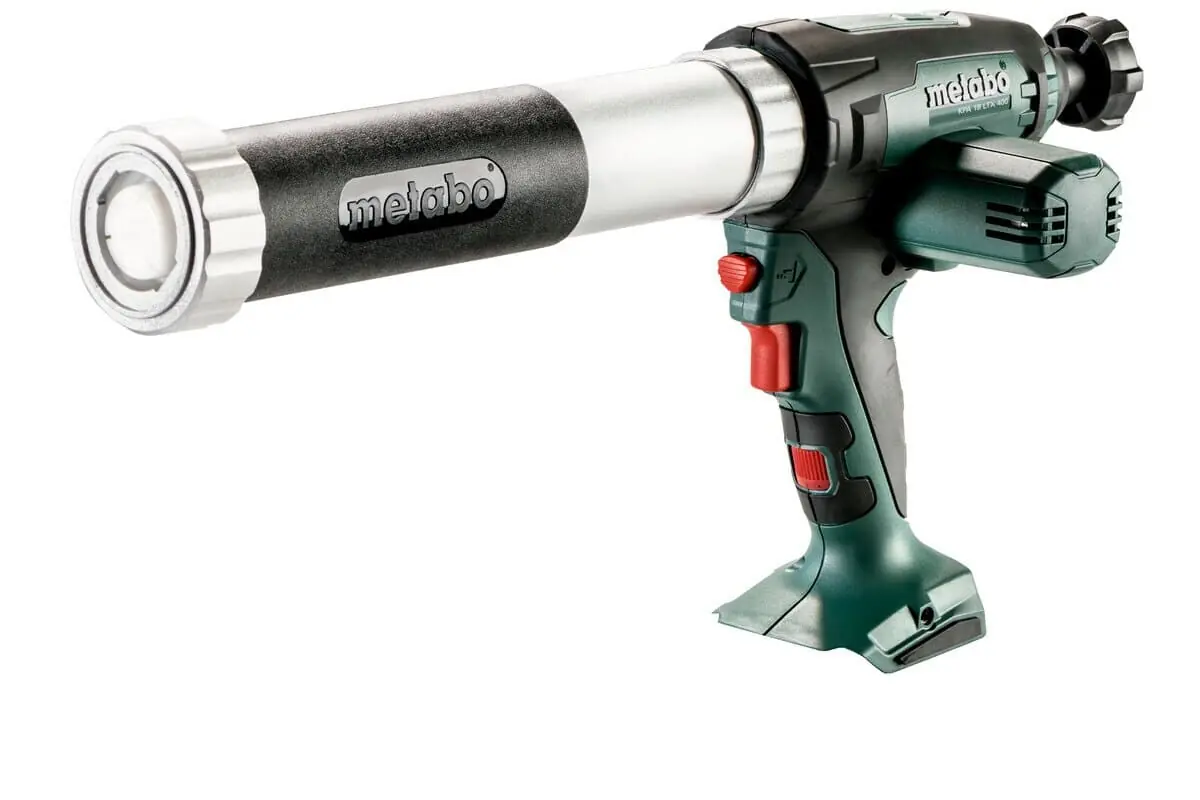
The Grip-Lok® Auto-Feed System with Bullseye® nose adaptor for rapid attachment of rigid insulation or lath to steel or wood substrates.
Labor saving. Faster than bulk screws.
For use with Grip-Deck® collated screws up to 3″ in length. Available corded or cordless. Designed for use with Thermal-Grip® CI Prong Washers or Plasti-Grip® ci Prong Washers to attach continuous insulation. Magnets on adapter designed for use with Grip-Plate® lath & plaster washers.
- Manufacturer tested, recommended, and approved
- Adjustable depth control prevents overdrive of insulation washer
- Available depth control prevents overdrive of insulation washer
- Available with collated screws up to 3″ in length
The Grip-Lok® Auto-Feed System with Bullseye® nose adaptor for rapid attachment of rigid insulation or lath to steel or wood substrates.
For use with Grip-Deck® collated screws up to 3″ in length.
Available corded or cordless.
Step 1: Choosing Screw Length & Type
Before using the Grip-Lok® Autofeed Fastening System, you’ll first need to determine the proper screw length and type for your project. Our Grip-Deck® ceramic coated self-drilling screws are suitable for heavy gauge steel studs ranging in thickness from 12-18 gauge, while our Grip-Deck® HiLo thread screws are suitable for wood substrates. For steel stud substrates, we recommend that the screw be an inch longer than the thickness of the insulation plus any possible layers of exterior gypsum sheathing. For example, if you are attaching 1 ½” thick insulation direct to steel studs, you will need 2.5” collated Grip-Deck® self-drilling screws. If there is a layer of exterior gypsum sheathing sandwiched between the insulation and the steel studs then you would need the 3” long self-drilling screw. For wood substrates we recommend a Grip-Deck® HiLo screw that will provide at least 1 ¼” of penetration into the wood substrate. The Grip-Lok® Autofeed Fastening System currently fits screws up to 3” in length.

Step 2: Philips or Square Drive
Make sure your tool has the correct driver bit properly inserted prior to use. Pushing back the slide on the front of the gun allows you to see whether it is a Phillips or Square drive bit. To change the bits, slide the red sliding button on the top of the gun while holding the nose piece back, then use your fingers to grab onto and slide out the drive bit. Insert the new bit, pull back on the red slide, tip the tool up, and pull the trigger to engage the bit.

Step 3: Screw Length Settings
Prior to loading the Grip-Lok® Autofeed Tool with screws, you need to set the correct settings to match the length of the screws. This is easily completed by pressing the button and sliding the nose stem until it matches your screw length.

Step 4: Loading/Removing Collated Screws
Depending on the length of screws, each strip has either 25 or 50 collated screws per strip, and two empty slots on either end. Take one end of the strip and start feeding it into the slot on the bottom of the tool. Slide the strip until the screw is the next slot in succession of operation. This tool is designed to index screws on the downstroke, so be sure the last empty slot is lined up with the bit.

Step 5: Adjusting Depth Control
There is a setting module on the left side of the gun to help install Rodenhouse washers flush every time when set properly. To adjust the depth, hold the red button next to the white unlock symbol. While holding the red button, turn the dial clockwise for deeper washer embedment or counterclockwise for shallow settings. There is a moving dial to visualize depth settings. Be sure the washers are installed flat on the surface of the insulation to seal against air and moisture penetration. Be sure to avoid washer or screw overdrive which may puncture or tear the facer.

Step 6: Nose Cup Adaptors
The Bullseye Nose Adaptor on the Grip-Lok® Autofeed Fastening System is specifically designed to fit our Thermal-Grip® ci Prong Washer. The Thermal-Grip® ci prong washers were developed with pre-spotting prongs to allow easy “on-the-wall” screw assembly. Simply press the washer into the insulation and match the Bullseye® nose cup adaptor over the raised hump on the washer. The Bullseye® Nose adaptor is also designed with magnets for use with Grip-Plate® Lath & Plaster Washers for lath and exterior gypsum sheathing attachment to wood or steel substrates. Simply place the galvanized steel washers centered on the magnetic nose cup and install the lath or gypsum sheathing with ease. Rodenhouse also provides unique Grip-Lok® nose cup adaptors available for building wrap attachment as well as mineral wool attachment

Step 7: Pro Tip
After installing roughly 5 to 8 screws, bend the leftover strip piece up towards the front of the gun. This prevents the strip from getting lodged in the opening on top of the tool and jamming the slider.


